The Kim Dress in Floral Print….. aka Outfit Along 2017

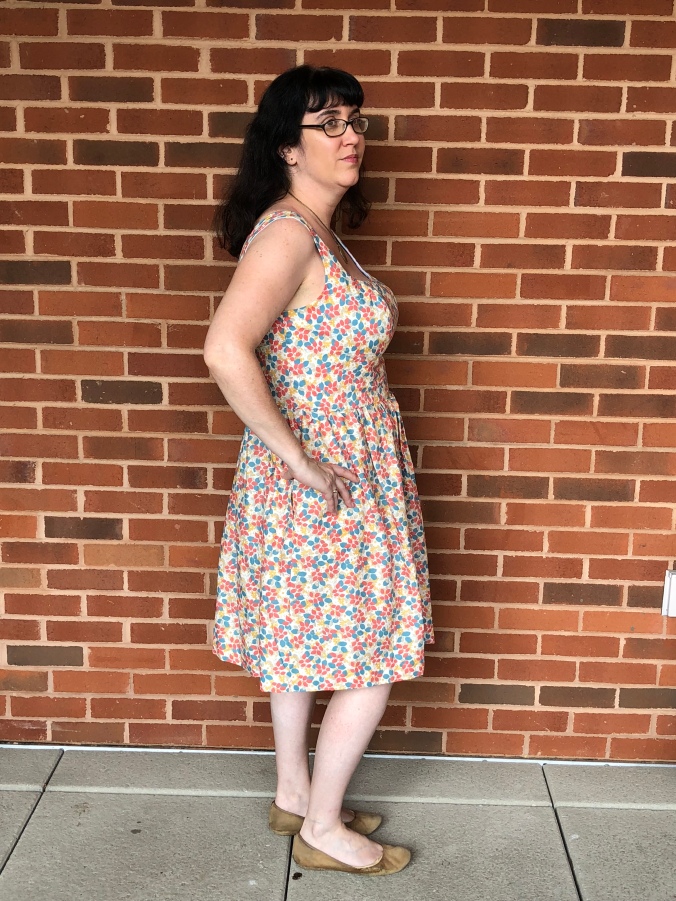
Adding to my better late than never category- I give you my completed outfit for the 2017 Outfit Along!!

image1

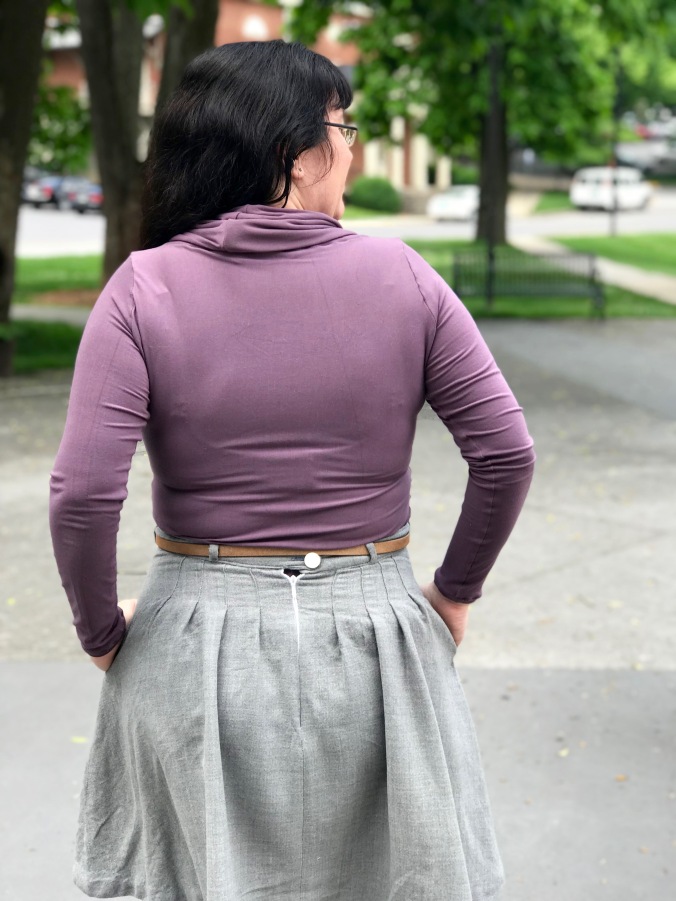
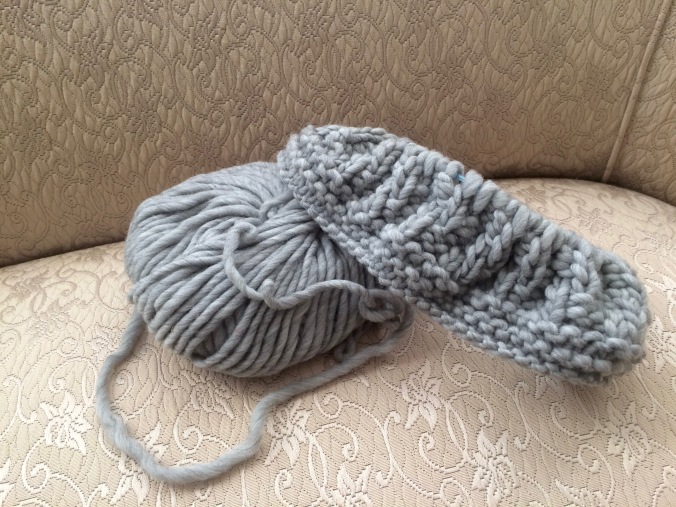
You’ll recall that I finished the sweater portion (a slate blue Miette) of this reasonably close to the deadline…..but never even started on the dress! :-/
Well after finishing this year’s OAL, I decided there was no time like the present to tackle last year’s OAL 😉

image1(5)

I made the suggested pattern- the Kim Dress from By Hand London.  This was my first time using a By Hand London pattern.  The one hitch I discovered was that they ONLY offer pdf patterns 😦  Because I hate printing and taping pdf patterns I did some research and pricing and ultimately paid to have it printed large format….. y’all this is a game changer for me!

IMG_1518

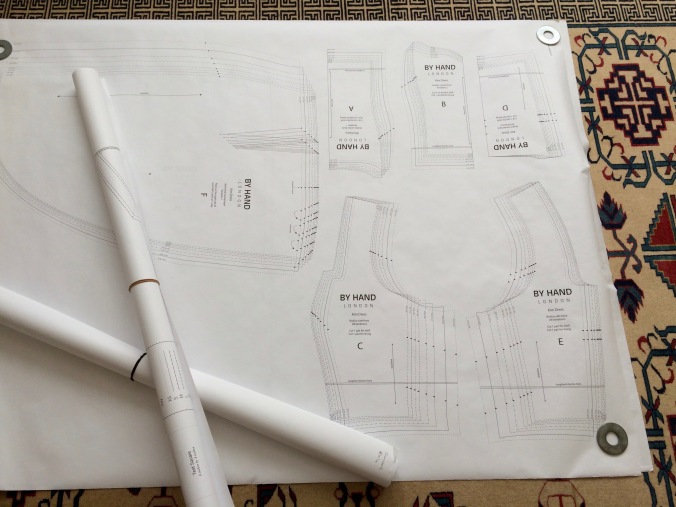
I used pdf plotting. They were cheap, much more reasonably priced than the local FedEx print center, but you will may need to have a minimum order (I think I got 3 or 4 printed out at once, but I don’t see anything about minimum orders on their site now).  And they were reasonably fast, not the instant gratification of printing it out right now, but reasonable.  I’ve also noticed they’ve greatly expanded the directions and information on pattern printing since last year- which is awesome!
It does take the price to basically the cost of a printed pattern, but for me it’s worth it…. did I mention I hate taping???

image1(6)

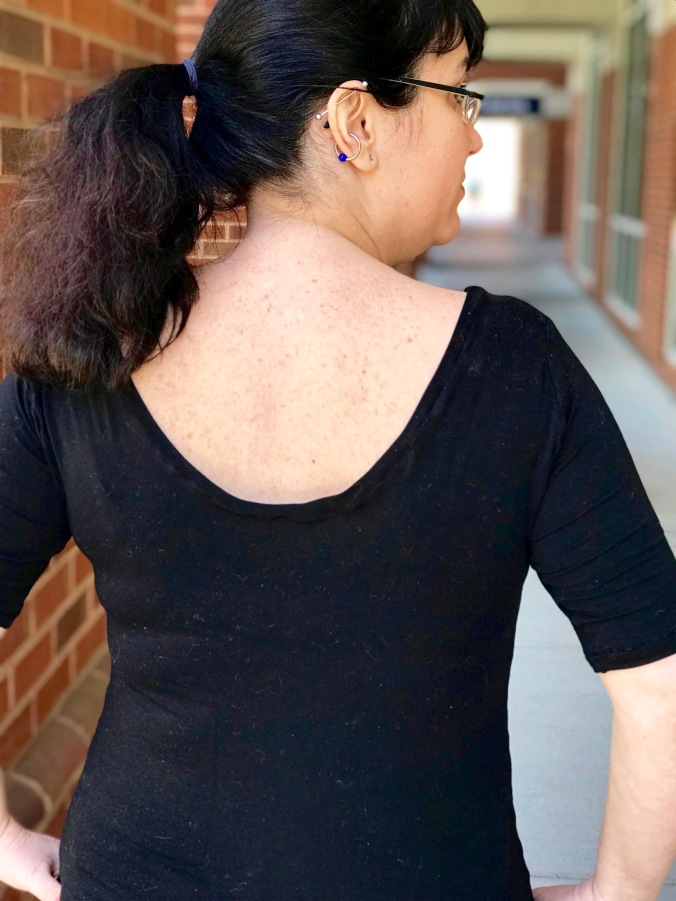
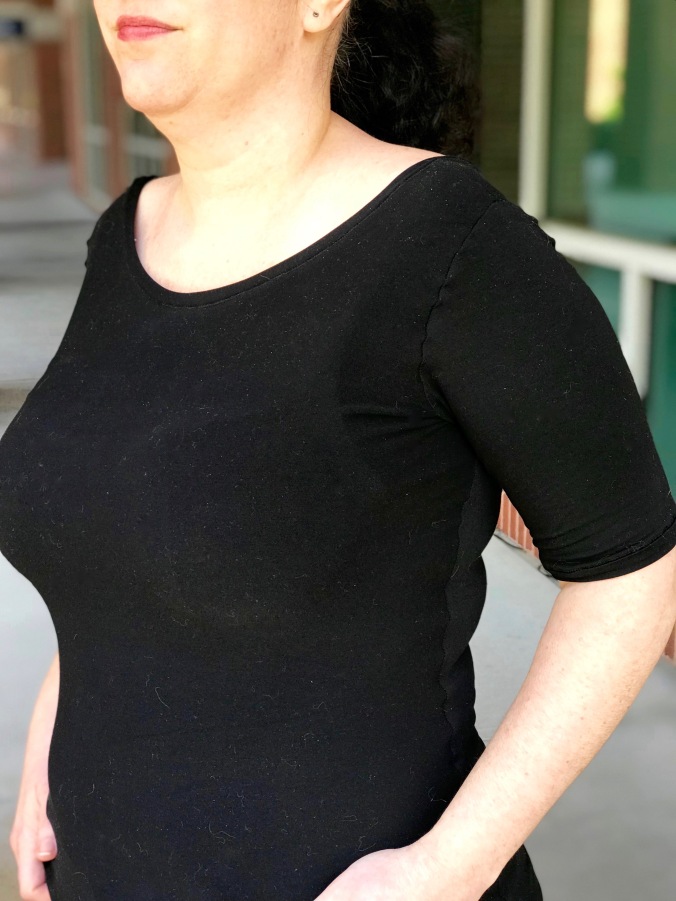
I did a bit of franken patterning and made the bodice from Variation 1 and the full skirt from Variation 2.  I started out by muslining the bodice and cutting this in a straight size 14, and that’s when the FUN began…. and by fun I mean total frustration and swearing!! I got so excited about the pattern, the dress, and the fabric it some how never occurred to me…. By Hand London is drafted for a B cup…. I am a DD (pushing a DDD)!!

IMG_1519

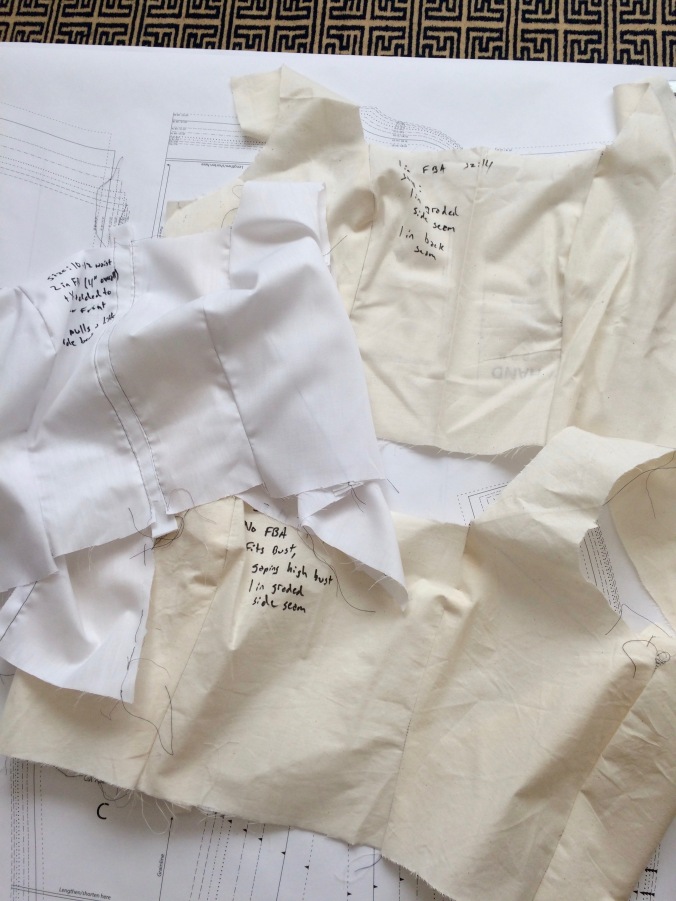
I ended up making FOUR muslins!!  I relied heavily on the Kim Dress sewalong, specifically the post on Full Bust Adjustments with princess seams.  I can’t find it now, but after two muslins I read a blog post from another blogger who discussed that if the difference between the Full and High bust is enough you should base the size you cut on your High bust and then adjust accordingly.  This proved the be just the advice I needed to prevent me from throwing EVERYTHING, so thank you nameless blogger!  This post from the Curvy Sewing Collective gives the same advice and provides a very handy reference for which pattern companies draft for what bust- spoiler it’s mostly B cup 😦

image1(2)

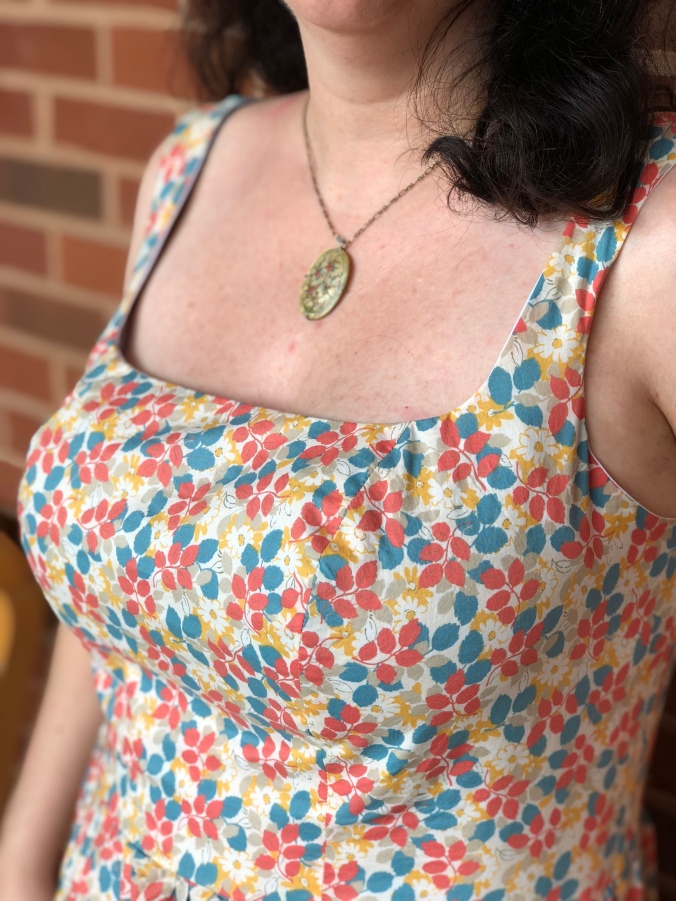
At the end of the day, I made a size 10 bodice with a 2″(!) FBA, graded to a size 12 at the waist, with 1/2 inch added to the center.  The skirt stayed a standard size 12, because nobody needs to fit a full skirt!

image1(4)

Although… I did end up making a few adjustments to the skirt…. Firstly, there’s probably about 3 to 4 inches of fullness taken out of the skirt because I didn’t have enough fabric 😦  I also left out the pintucks, because I figured they would get lost in the pattern.  And finally, I added POCKETS!!  Because what’s the point of a full skirt if you don’t have pockets!  Unfortunately, I did forget about them when attaching the skirt so they don’t exactly line up with the side seams…. but… eh…. whose counting 😉

There’s still some minor adjustments I may try for next time…..

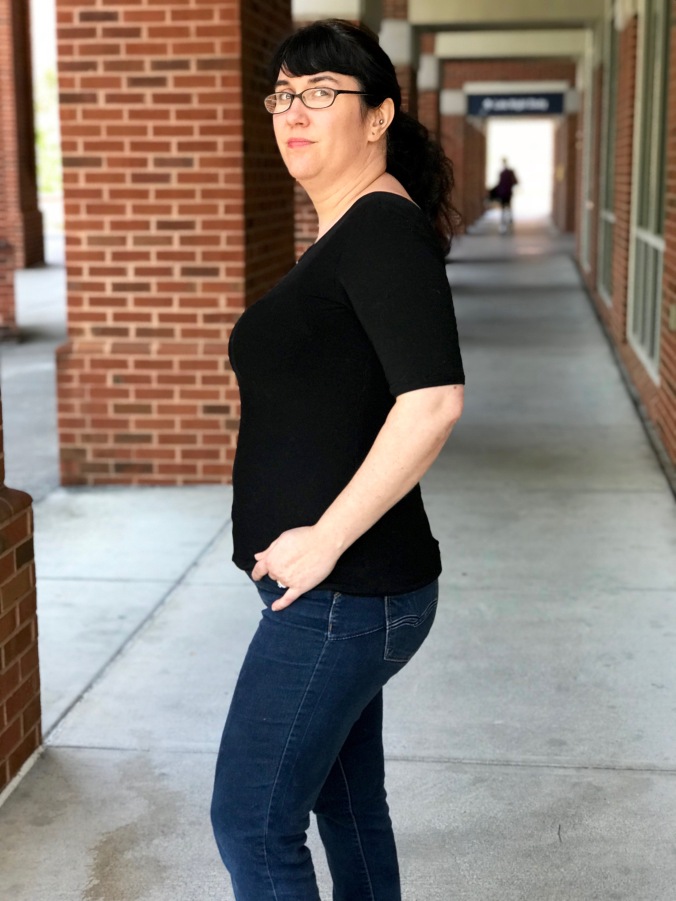
  1.  I will probably try for a size 10 waist and skirt, things were surprisingly a bit loose at the mid section (FYI: based on the muslin I was afriad it would be too small!).
  2.  Maybe try to actually do a sway back?  I’m increasingly wondering if this should be an adjustment to try out…
  3.  Add some of those bra strap hold-y things….. Unless I stand exactly just so they start to peak out from behind the straps…. as evidenced in these photos!

image1(3)

The fabric is a really lovely light cotton- maybe cotton lawn?  I fell in love with the pattern- kinda fall colors, but with a springy motif!
As with all my super nice fabrics I got it from Mulberry Silks 🙂 I was nervous at first it would be a bit through at the skirt, I actually bought extra lining fabric (just a light cotton blend from Jo-ann’s) to make a slip, as it turned out it wasn’t necessary!

image1(1)

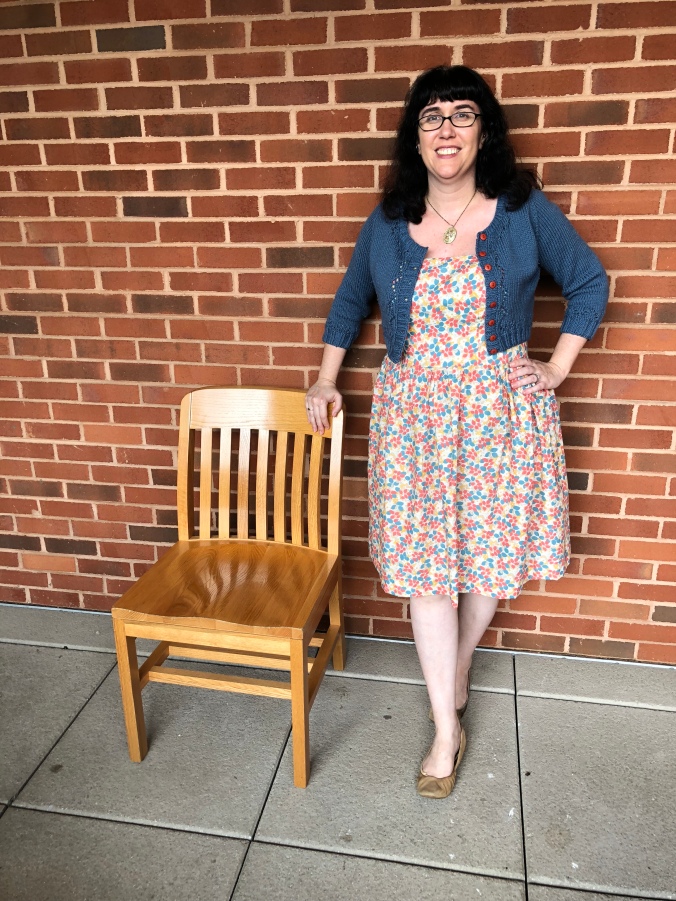
All in all, I’m really digging this Kim dress!  The fabric is just right and I think with a couple more tweaks to the fit it can become a real staple….. part of me wants to go crazy and try for a sequin party dress!
And with that I not only finished an Outfit Along, but also ticked off my 6th item in the 2018 Make Nine challenge!!


Outfit Along 2018…. Finished Objects!

It’s official I finished the Outfit Along….. a month late….but I finished 🙂

image1(3)

I stuck very true to the Outfit Along and made the suggested True Bias Lander Pants…. or in my case shorts… and knit the Waters top.

I’ll start with the shorts…

image1(4)

This was my first time using a True Bias pattern and I was SUPER pleased with it!  I cut a size __ and it pretty much fit right out of the envelope….which never happens!!  I’ve had the chance to wear them a few times and I may want to adjust the crotch depth the next time I make them, but that may be partially due to my fabric choices (see below!).
I used the Lander Sewalong extensively and it proved quite helpful!  I also used Lladybird’s method for the belt loops, which was much easier than the tube turning mess.

IMG_1475

Now while the fit was more or less fantastic I may have messed up on the fabric 😦  I used the discount code and bought Robert Kaufman Brussels Washer Linen in Navy from The Confident Stitch.  The fabric is really nice…..but has a tendency to bag out (and wrinkle, but it is still a linen) and was really probably not the best for these more structured shorts.  Which I have just now realized they specifically warned about in the description <facepalm>  When I remake them I’ll probably do it in a nice twill 🙂

IMG_1476

Now I did take this up a notch by using really special buttons…. so special in fact I will probably move them on to the new pair of shorts when I re-make them.  These buttons came from my Grandpa’s Navy uniform who served during World War II!  My Mom gave me an old box labeled “Navy Buttons” and I found these among the more obvious eagle and anchor Navy buttons.  I know his actual uniform was destroyed in a flood, but I think someone may have gone through and cut all the buttons off it before tossing it.   I can’t tell what they’re made of, but they are quite solid and sturdy. [FYI: They got really blown out in these photos, the true color is closer to the outdoor shots- kinda of a linen/off white.]

IMG_1477

Now on to the top!  I was originally planning on making Zinone (even had yarn & color scheme picked out), but when Andi released Waters and it was on sale…. I immediately changed plans! [Also, I FINALLY actually bought one of her patterns and so can stop feeling guilty about being a freeloader.]

image1(7)

This was a fairly easy pattern to follow.  I thought I was going to have a hard time remembering to switch colors for the stripe pattern, but that was actually super easy!  I knit it in a size Large and the fit is very good.  As always, I went up a size on my needles to a size 4 to get the right gauge….. of course that was only after I bought the size 3 needles 😦

image1(6)

I used Lindy Chain yarn, because it was a lot cheaper than the suggested yarn, in Navy and Mist.  It wasn’t the original combination I wanted, but I think I actually like it better then the original Navy/Linen combo (they were out of Linen when I ordered).
The only issue I have so far discovered is that despite the linen/cotton yarn and the short sleeves this is still a sweater and it gets HOT!!  I walked around the historical Tree Streets neighborhood with a friend to get these pictures and by the end I was sweating up a storm! (or glisten- as a proper British woman once told me “Ladies do not sweat, they glisten”)

image1(1)

Overall, I’m quite pleased with the outfit…. and the fact that I actually finished the Outfit Along!!  I will definitely be remaking the shorts in a better fabric…. and probably give the pants a shot too 🙂

And BONUS- this will fulfill two from my Make Nine challenge!!  Knit a sweater (check) and I’m going to count my shorts as my Wild Card (double check)!  That brings me to five down 😀  Woohoo- over 50% complete!!

image1(9)

Don’t let the fall decorations fool you…. it was hot!

Even More Grail T-shirts…..now with more pattern hacking!

Yes!  As promised here are my most recent Grail T-shirt additions…. which have joined their SEVEN other sisters in my closet! …side note…it would’ve been eight, but I’ve some how seemed to have lost one of my bamboo t-shirts  😦 😦

No matter! Check out my new ones!

IMG_1255

Both these shirts were created to replace/replicate beloved RTW shirts that are either too small or just plain worn out….both actually from Banana Republic!

First up we have another Grail/Refrew mashup!

image1(7)

This is the exact same as my first Grail/Renfrew mashup except in this lovely lilac/grape.  I used a Bamboo jersey, because I’m a sucker for bamboo, in mauve.

image1(8)

Sadly, I bought this over a year ago from Mood and they are no longer selling this color 😦  Especially, sad since all my co-workers were telling me what a great color it was on me.  However… Mood always has a pretty nice selection of bamboo jersey.

image1(10)

It’s replacing a lovely cowl-neck short sleeve light sweater thing.  Perfect for Charleston winters, however, sadly quite lacking for East Tennessee winters 😦  Also, if we’re being honest way too small for my current figure!

image1(9)

I’m wearing it with gray wool Zinnia skirt…. this was probably a bit much for the current weather…but with the AC cranked at work it wasn’t too bad.

Next up we have a completely new pattern hacking!

image1(1)

So, this is inspired in equal measures by a ballet scoop top I had that I wore until it more or less fell apart and a t-shirt a co-worker had….and the Nettie bodysuit if we’re being honest.

image1(4)

For the front of the shirt I used the crew neck pattern piece in order to have a somewhat high neckline, but not too high.  In the back I retraced the neck opening to be much lower-  I used the scoop neck pattern piece as a guide.  I also shortened the 3/4 length sleeve to a half sleeve length.

image1

The fabric is again a black bamboo jersey from Mood.  And while it is a cat hair magnet, I swear it’s not nearly as bad as it looks in some of these photos!

I have notice some issues with the shoulders staying up….but honestly nothing too bad and a lot less than I expected.  I’m always amazed at how people mange to get the SUPER scoop back tops and dresses to stay on…. what’s their secret??? Really good posture? ….magic?? ….double sided tape???

image1(5)

I’m counting this as my 2nd and 3rd make in the 2018 Make Nine challenge!  Woohoo! 1/3 of the way there 😀


Spring Moneta in Art Gallery Print!

I actually started this project last fall. I finished everything except hemming when the weather turned cold….. and then lost any and all interest in finishing it, but with the weather warming back up**… why not?!

image1

This is my third crack at the Moneta…. and I feel I may have finally worked the kinks out! 😀

image1(2)

I’ve made a couple more tweaks and adjustments.  The main one, which I feel has helped the fit for me, is I graded the shoulders down to a size M.   This is increasingly becoming a fairly necessary adjustment for me.  I could learn to do a proper narrow shoulder adjustment…. but, eh….. this is working so far 😉

image1(6) (1)

The other adjustment was finishing the sleeves and neck with a band, a la my beloved Grail t-shirt, as opposed to just turning it under.  I used zigzag stitching throughout- I have given up trying to make friends with the Twin Needle…. it is the devil and I will have no part of it!

image1(5)

The fabric is an Art Gallery print (I’m pretty sure?) from my local fabric store… every time I go in there it takes all my strength to not walk out with one of each of their knit fabrics!!

Keen eyed observers will notice there is a very subtle direction to the print (one of the flowers has a stem!)…. even keener eyed observes will note that despite being aware of the directionality of the print I still managed to cut one of the skirt panels upside down!  *face palm*  Eh….at least it’s not as bad as upside down deer heads!

image1(4)

I was stepping a bit outside my comfort zone with this one….not only is it rocking a fairly busy pattern, but it has (just a bit) of neon!!  My firm opinion of neon is it wasn’t a good look in the 80’s/early 90’s and 25-35 years has not improved it!!  ….this actually extends to ALL fashion from that time period- stop trying to bring it back!  *Shakes fist at young teens, before yelling at them to get off my lawn*

image1(7)

But it must look good on me, because I was getting all the compliments when I wore it out the first time!  Which is good, because I’m pretty sure I have enough leftover to make a t-shirt 😀


** These were all LIES- the temperature has dropped and yesterday it actually snowed 😥

Cotton Flannel Carolyn Pajamas in Navy…..FINALLY!

Yes…. I have finally finished my Carolyn Pajamas….. after only 1.5 years.  This project may have upset my Vogue Cape as the longest sewing WIP.

IMG_1145

My husband completely directed this shot… down to the tiny coffee cup… it was adorably hilarious!

I actually started this intending to post it to Allie J’s Social Sew– RIP 😥  But, obviously did not quite finish it in time.
This is my first crack at the Carolyn Pajamas and my first crack at a Closet Case Pattern (hooray branching out!)….. so of course I choose the most complicated version- Version B with piping….  And no muslin!  Shock, HORROR…. Liz not muslin!!! What is the world coming to??!?!

IMG_1140

Yes!  Partly in order to save time so I could finish in time for the Social Sew [HAHAHAhaha…HAHAhaha :-D], but also because it seems very silly to muslin a pair of pajamas :-/  Therefore, I cut straight into my fabric- Kaufman Shetland Flannel Herringbone in Navy…..and surprisingly enough it worked out!

IMG_1142

I really like the fabric!  It takes stitching really well in that way where the thread just sinks in 🙂  Unfortunately, I have noticed some piling on the bottoms which have already gotten a few washes 😦

IMG_1143

I dug through my Grandmother’s button collection and hemmed & hawed about the buttons.  I finally decided on these, rather large, white buttons.  I think they’re made out of shell or mother of pearl… or something?  You’ll notice there’s only 4, whereas the pattern calls for 5- how very astute of you!  Yeah… despite my exhaustive digging I could only find 4, but it actually works since they’re so big.
Also… after sewing all the button holes I discovered I had actually bought buttons specifically for this project and “cleverly” tucked them in my project bag… where upon I promptly forgot about them!  But I actually like my vintage buttons a lot better 😀

IMG_1147

As I said before this was my first Closet Case Pattern…. despite owning like 5… I have a hoarding problem :-/

The directions took some getting used to…. there wasn’t as many pictures as I would like, being a very visual learner.  But the two tutorials Heather did on sewing the piping and the notch collar were invaluable!
FYI: I did NOT make my own piping- because I may be crazy, but I’m not fucking crazy 😉 I used this one.  Also, this pattern uses A LOT of piping, despite the minimum order I only have one full package left.

IMG_1148

I shortened both the pants and top by about 1 inch, but it’s still a little too long….Heather is a GIANT!! …..Or more likely I am very short, either way, just be forewarned all my vertically challenged sewing friends 😉
I’m wondering if I maybe even need to go down a size??  I’ve lost about 10 pounds since the time I started on this… ugh I just realized I may have to re-trace all those little pieces 😦

IMG_1149

Overall, I really like this pattern!  It’s stylish AND incredibly comfortable…. I already have an absurd amount of fabric for other versions- including a super cute summer version!
In the meantime, this will nicely fill my winter pajama hole… and none too soon! We got 2 inches of snow last night!!

IMG_1154

This marks my first make in my 2018 Make Nine Challenge!!  Woohoo- one down eight to go 😉

Works in Progress XVIII….. plus bonus Finished objects!!

It’s been a hot minute since I’ve done one of these…. and I’m actually working on stuff for a change!

I’ve finally gotten back into working on my Carolyn Pajamas…. and after over a year (!) I finally finished…. the bottoms :-/

IMG_1103

Where upon I promptly put them on and got to work on the top 🙂

I’ve also started a new knitting project.

IMG_1105

A super chunky, super squish cowl!  I got the yarn and freebie pattern from Purl’s Yarn Emporium…. a shop everyone should check out if they ever find themselves in Asheville 🙂

Both these projects will fit in nicely with my “Winter is Coming Wardrobe”- the pajamas in particularly will fill a distinct me-made pajama gap in my wardrobe (winter or otherwise)!

Closest Case Files has also declared it No Fear Jeans Month…. and while I’m not crazy enough to declare I’m going to sew my Ginger Jeans this month…. that would be crazy!  I am going to take it as a hint from the Universe to finally *start* on them!

IMG_0416

Ginger Jeans

I’m setting the very modest goal of settling on a size and tracing the pattern 🙂  ….which makes this post, that was just posted incredibly useful! Thanks Heather!

And finally my first make of 2018:

IMG_1099

Oh Lulu Grace Panties!  I had cut these out eons ago and finally got around to making them.  I added the tiny little buttons so now their vaguely nautical themed 🙂  I’m pretty sure I salvaged those buttons from another pair of undies that got destroyed in the dryer- hooray recycling!

Armande Sweater in Tweedy Oatmeal

Woot! A finished object!! I had meant to post this as one final make for 2017, but that cruel bitch that was 2017 had one last ‘fuck you’ in store for me…. the stomach flu (or food poisoning) on New Years Eve [insert vomit emoji].  I will spare you the graphic details, but I will say that it is not an experience I would wish on my worst enemy.

At any rate, back to more pleasant matters.  I give you my finished Armande!

IMG_1057

Armande is a bottom-up seamlessly knit cardigan sweater from Andi Satterlund.  I knit this in a size large, using size 8 needles to get the right swatch.  I started it around Christmas 2016 and finished it up around Christmas 2017 🙂

And what a start it was!! I had a pretty rough time with it at the beginning….particularly the pockets.  I ripped back and re-started them twice before I finally frogged the whole damn thing and started from scratch.  But honestly the whole thing was user error….never question the directions!

IMG_1066

Despite the rough start I do really like the way the pockets were knit, it makes for a very smooth and seemingly very sturdy pocket 🙂

Otherwise it’s a fairly simple knit, great for binge watching and knitting days…. Knitflixing if you will 😉

IMG_1062

I was a bit nervous about the fit, but other than being slightly big in the shoulders it’s pretty good.  In these shots I’m wearing a sturdy long sleeve shirt under it…. this one actually!

IMG_1063

The buttons are again from Wood Buttons.  These actually weren’t what I originally ordered, they were out of that and sent me TWO replacement sets instead of slightly different buttons.  I honestly can’t remember what I originally ordered and am quite pleased with these.

IMG_1067

The yarn is Homestead Tweed from Plymouth Yarn Company in Oatmeal Tweed.  When I envisioned this sweater it was with this EXACT kind of yarn and lo & behold I was actually able to find it!!

It was my last purchase from my old LYS The Village Knittery…. which just recently went out of business 😥 😥

IMG_1056

But cry not, for I have this insanely warm sweater to remember them by!  Yes, it is fitting nicely into my Winter is Coming Wardrobe already…. because as you know if you live anywhere along the eastern seaboard of the U.S.- SHE HAS ARRIVED!!

IMG_1054

Slate Blue Miette…. aka half of OAL2017

While it is increasingly looking like the Kim dress portion of the Outfit Along will not be finished…. or…err started….. for some time, I have finished the sweater portion!!

IMG_3845 (1)

This is my second Miette sweater!  I had issues with sizing on the first one and didn’t even bother to put buttons on it, because that shit wasn’t going to close.

This time though I got serious about sizing and taking my time with the swatching…. you can read more about that process here.  And that work paid off 🙂

IMG_3846 (1)

The fit came out real well!  I followed the pattern fairly closely this time to make a true cropped sweater…. my first version I lengthened quite a bit.  I did add a couple of rows to the button band on this one though, because I was paranoid it would be too small again.  That is a also why the top button is out of line with the others :-/

The yarn is the worsted weight Cascade 220 in the Atlantic color, which I ordered online.  And after much deliberations I settled on these rust colored buttons from my local fabric store In Stitches 🙂   I had wanted to use these awesome vintage shank buttons I’ve had in my stash for FOREVER… but alas there are only 5 😦

IMG_0990

So, there you have it!  There’s not a whole lot more to say…. this is a great free, beginner pattern and would work great as someone’s first or second handmade sweater.

IMG_3847 (1)

I’m hard at work on my Armande sweater, I’m hopeful I’ll finish it in time to wear this fall/winter…. famous last words 😉

IMG_3848 (1)

Throwback Thursday: Simplicity 2286 in Vintage Barkcloth

Yes…. in a blatant ripoff of the Sometimes Sewist, I’m posting a Throwback Thursday…#TBT to you young, hip kids 😉

IMG_3764 (1)

This is my Simplicity 2286 completed way back in 2012, solidly pre-blog.  In fact, this was the first finished garment I made once I really got into sewing…. There was a very 80’s leopard print jumper/overall atrocity made for a Girl Scout sewing badge in elementary school, which we don’t talk about *shudder*.

Simplicity 2286 is solidly a beginner/learn to sew pattern and a really great one!  There’s no closures, but a lot of very basic skills 🙂

IMG_3766 (1)

I honestly can’t remember too much about making this, except I basically completed it in a day from cutting the pattern pieces to hemming.  I also cut straight into my “special” fabric….no muslins, no trial runs in less “special” fabric!

IMG_0983

The fabric is a vintage barkcloth my Mom had gotten, she had had it since forever (I remember rummaging through her fabric stash and finding it periodical growing up).  I’m not sure how old it actually is, but I’d say at least 1970’s.   And there couldn’t have been much more than a yard 😦

It is amazing looking back….. I just jumped straight in- there was no hemming and hawing about finding the “right” pattern, no muslins, no trial runs to make sure I had gotten all the techniques down; there was just cutting (and the hubris of a beginner).  I guarantee you had I not made this skirt that fabric would probably still be languishing in my stash waiting for the “perfect” project….. there’s a lesson somewhere in that :-/

IMG_0984

Now, being the n00b that I was, I actually didn’t finish the seams….at all.  I also, used the wrong size elastic, twisted said elastic, and then hemmed it too short.  It was kind of a hot mess if you looked close enough! So, after a year or two of things slowly unraveling with each wash, which honestly wasn’t that much because I hardly wore it due to fear of flashing everyone every time I bent over, I went back and “fixed” everything.

IMG_0985

I used store bought bias tape and finished everything with Hong Kong seams.  I also unpicked the hem and used lace hem tape to help lengthen things a bit.  And replaced the elastic.

Since then I’ve gotten a lot more use out of it!  I still find it a bit short and so will usually pair it with tights, but given I only started with about a yard it’s not too bad!

IMG_3765 (1)

And there you have it!  I’ve got a couple of other pre-blog makes I could post about, so we’ll see if this becomes a regular thing 😉

Zinnia Skirt in Sand Washed Navy Tencel

This may be the most expensive object I’ve made….. and it is worth EVERY penny!!

IMG_3095

This is (finally) my finished version 1 of the Zinnia skirt.  At some point I had vowed to make this skirt and promptly spent way too much money on this fabric (according to my husband, but what does he know!). The fabric then proceeded to sit in my stash for over a year :-/
It is sand washed tencel….. and HOLY SHIT it is like butter!
I mean look at this:

IMG_3100

That was just a slight breeze 😉

The fabric came from Mulberry Silks…. which is were ALL my good fabric comes from!  They told me specific washing instructions….which I promptly forgot 😦  After some Googling, I decided to pre-wash it in the machine and handwash it for all subsequent washes.  I am usually pretty hard on my makes (machine wash ALL the things!), but I’m trying to be better about that :-/

IMG_3097

The buttons are pretty awesome!  They are made from corozo or tagua nuts….. otherwise known as vegetable ivory.

IMG_0940

This company is neat- everything is made in Brooklyn and although there is a minimum order, they have some pretty gorgeous buttons.

IMG_3098

Construction was fairly simple and straight forward.  I busted out my new edgestitch foot for this…. and holy crap is that thing AWESOME!  I used it on practically everything, including, but not limited to: the pockets, the button placket and the waistband.

IMG_3102

I decided to leave the pocket flaps off, because they just seemed un-necessary.  Also, pockets!!

I used French seams throughout, which coupled with the button placket makes for a very clean finish inside (which I forgot to photograph… you’ll have to take my word).

I cut this in a size 16, which was a size up from my usual size 14 for my two previous Zinnia skirts. I figured since my old Zinnia’s were getting a bit snug I should size-up….. and I was wrong 😦  This actually turned out to be a bit big, I probably should’ve stuck with my original size :-/

IMG_3094

But it still works!  And of course what this means is I can’t lose any more weight 😉   …..in fact I should really have some extra cookies and ice cream to ensure a better fit 😀

IMG_0938

If you recall I ran into some trouble with a mystery stain…. that is still a mystery, I have no idea what the fuck that was.  But true to everyone’s assurances they did come out with the first washing 🙂

And there you have it!  All I need now is to make Version 3 and I’ll have the Zinnia trifecta!